Potatoes are one of the most popular, and often most productive crops grown in the home garden. Zone 9 is to warm to grow the famous russet potato with consistent success, but the Red Potato will grow quite well. Here is how to grow this fabulous spud:
Soil Requirements
As with any potato crop, red potatoes require a loose loamy soil that his high in nutrients and organic matter. Red potatoes are heavy feeders that require deep, loose soil.
Location Selection
Red potatoes are heavy feeders and enjoy full sunshine for more than 6-8 hours a day. Select a location in the garden that will not only meet the soil requirements as listed above, but also meet the sun requirements. Also note the drainage of the potential bed. Soggy soil or standing water can easily ruin a potato crop.
Preparing the Seed Potatoes
After all threat of frost has passed it is time to sow red potatoes. Start with seed potatoes from a nursery or ordered online (store bought potatoes often have chemicals that stop them from budding). Using a clean, sterilized knife cut the seed potatoes into roughly golf ball sized portions that have about 2-3 eyes each and allow the seed potato to heal in a cool dark area for about 2-3 days (this helps prevent them from rotting).
Preparing the Bed
When preparing a bed to grow red potatoes it is recommended to work compost or composted manure about 3 feet into the soil, this will help add nutrients, loosen the soil, provide organic matter and help keep the pH in the 6.0-6.5 range that this crop prefers. After working compost into the soil, dig trenches about 6 inches deep that are about 2-3 feet apart. (Red potatoes can be grown in closer rows or in a square foot gardening method much better than russet and other larger potatoes can be)
Sowing Red Potatoes
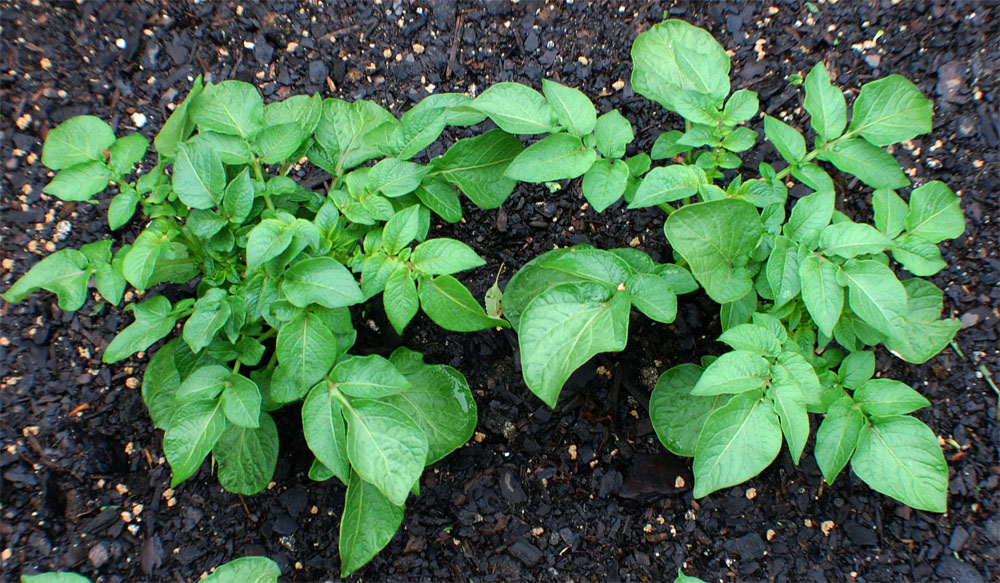
Once the potato bed is prepped and ready place the seed potatoes in the trenches about 8-12″ apart. Cover the seeds with about 3-4″ of soil and water enough to dampen the soil. 1-2 weeks after sowing the potato seeds the first sprouts will appear.
Hilling
Once the sprouts reach about 6″ tall, it is time to add more soil/compost. The process of hilling helps prevent potatoes from being exposed to the sun which causes them to turn green and become inedible. Add about 4″ of a high quality soil or soil/compost mixture. It is okay to cover some leaves, just be sure that some leaves remain above the soil.
When the plants are 6″ above the soil again, it is time to once again add more soil. This process should be repeated until about 6-8″ of additional soil is added above the original soil level.
General Care
Potatoes, in general, are heavy feeders and red potatoes are no different. Add a high quality fertilizer as soon as the plants are over 6″ tall and reapplying the fertilizer every 2 months.
Every other week feed the plants with a high quality liquid plant food that the nutrients are immediately available to the plant. We prefer Jobes Organic. (This is a link to Amazon that Zone9Garden.com may profit from. This helps support the website).
Harvest
Harvest can generally occur at two times. The first is for harvesting “new” potatoes, young, smaller, more tender potatoes, and the next is fully mature potatoes.
New Potato Harvest
New potatoes are typically ready for harvest 2 or 3 weeks after the plants have flowered. On a dry day, use a fork or shovel to carefully dig around the plants and pull the potatoes out of the soil. The more care that is taken, the less damage that will be done to the skin of the potato, making them more stable.
New potatoes should not be cured as their skin has not thickened, and should be eaten with in a few days of harvest.
Mature Potato Harvest
For fully mature potatoes harvest should occur up to two weeks after all foliage has died back. If the foliage has not died back, maturation can be expedited by cutting the foliage to ground level and then harvesting the potatoes 1-2 weeks after.
Curing Red Potatoes
After harvesting the potatoes, allow them to air dry for a few hours. Brush all soil from the potatoes and place them in a cool, dry area that is between 45-60 degrees with a fairly high humidity. Leave them there for 10-14 days. During the curing any scrapes will heal and the skin will thicken, allowing the potatoes to store much longer. Sort the cured potatoes and remove any that are soft or discolored.


